Creating a swap file on Ubuntu 18.04 LTS
Note
This post may be partially machine- or AI-translated. If there is any discrepancy, the Korean version takes precedence.
Note
This post might be outdated and some links might not be available.
When using a low-cost Amazon Lightsail plan, RAM can sometimes be insufficient. Upgrading the instance plan is the best solution, but I allocated swap space instead.
Check the system’s swap space
Check whether the system already has swap space.
$ sudo swapon --showIf nothing is printed, there is no swap space.
Create the swap file
Create a swap file in the root directory.
(1024 bytes * 1,048,576 blocks = 1 GB)
$ sudo dd if=/dev/zero of=/swapfile bs=1024 count=1048576Change the permissions of /swapfile.
$ sudo chmod 600 /swapfileMark the created file as swap space.
$ sudo mkswap /swapfileEnable the swap file
Make the system use the swap file.
$ sudo swapon /swapfileCheck the swap space information.
$ free -hResult

Mount at system boot
Configure the system to mount the swap file automatically on boot.
Add /swapfile swap swap defaults 0 0 to the last line of /etc/fstab.
$ sudo echo '/swapfile swap swap defaults 0 0' | sudo tee -a /etc/fstabExtra: Lightsail instance launch script
This automates the steps above.
On the instance creation page, select “Add launch script”.
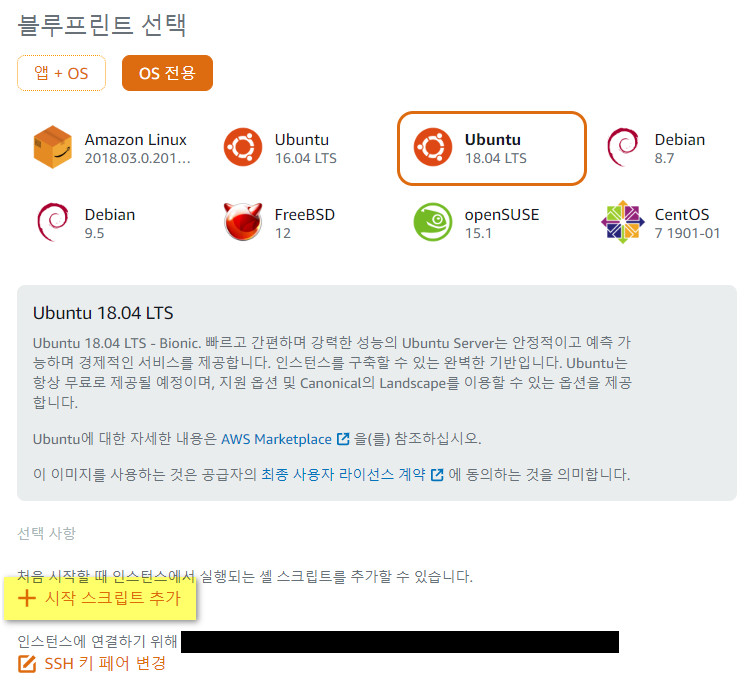
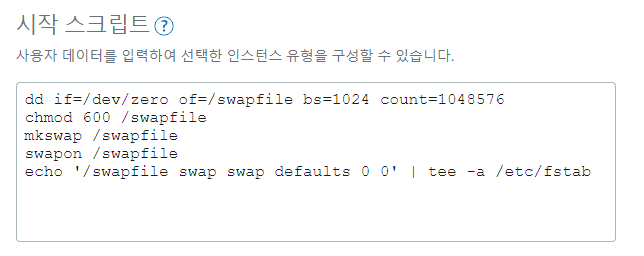
Enter the following as the launch script:
dd if=/dev/zero of=/swapfile bs=1024 count=1048576
chmod 600 /swapfile
mkswap /swapfile
swapon /swapfile
echo '/swapfile swap swap defaults 0 0' | tee -a /etc/fstab
Commands sent during server provisioning run as root, so sudo is not necessary.
Then finish the remaining settings and create the instance.