Installing Resilio Sync on Ubuntu 18.04 LTS
Note
This post may be partially machine- or AI-translated. If there is any discrepancy, the Korean version takes precedence.
Note
This post might be outdated and some links might not be available.
I installed Resilio Sync after running into Dropbox’s device sync limit.
This guide uses Ubuntu 18.04 LTS.
Add the Resilio repository
Create /etc/apt/sources.list.d/resilio-sync.list and register the Resilio repository.
$ echo "deb http://linux-packages.resilio.com/resilio-sync/deb resilio-sync non-free" | sudo tee /etc/apt/sources.list.d/resilio-sync.listAdd the public key for the Resilio repository.
$ curl -LO http://linux-packages.resilio.com/resilio-sync/key.asc && sudo apt-key add ./key.ascUpdate the package list.
$ sudo apt updateInstall and configure Resilio Sync
Install the resilio-sync package.
$ sudo apt install resilio-syncRecommended only when the server is behind a firewall. Allow Web UI access from every subnet.
# nano /etc/resilio-sync/config.jsonChange "listen" : "127.0.0.1:8888" to "listen" : "0.0.0.0:8888".
After editing, the file looks like this:
{
    "storage_path" : "/var/lib/resilio-sync/",
    "pid_file" : "/var/run/resilio-sync/sync.pid",

    "webui" :
    {
        "listen" : "0.0.0.0:8888"
    }
}
Enable the resilio-sync service in systemd.
From now on, it will run automatically as the rslsync user when the system starts.
# systemctl enable resilio-syncStart the resilio-sync service.
# systemctl start resilio-syncOpen http://localhost:8888/.
Enter the account to use for the Web UI, then set the device name. (The name set here cannot be changed later.)
Create a shared folder
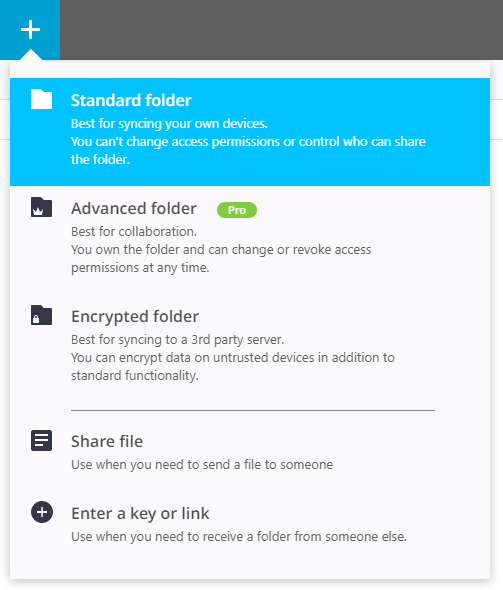
Click the + button in the top-left of the Web UI and choose Standard Folder.
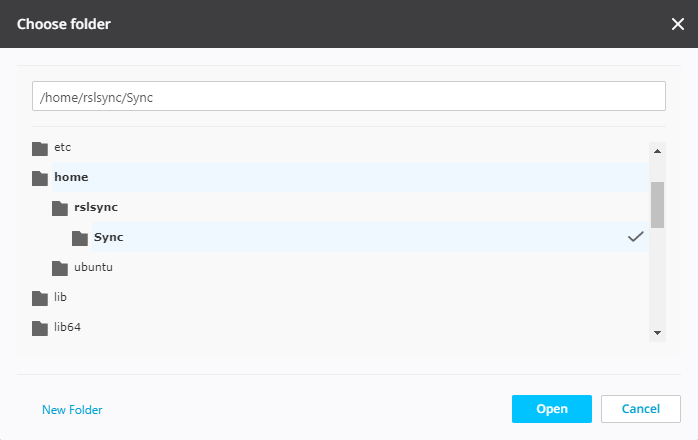
Because Resilio Sync runs with the rslsync user’s permissions, I created the folder under /home/rslsync.
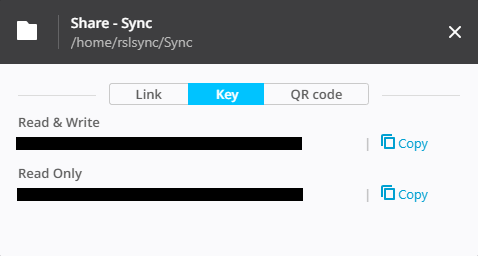
Use the Read & Write key generated on the Key tab to add clients.
Client download
https://www.resilio.com/individuals-sync/