Hyper-V 가상 컴퓨터에서 호스트의 USB 장치를 사용할 때의 설정법입니다.
Windows 10 Education 1903 (18362.207) 환경에서 진행합니다.
이 글의 내용
Hyper-V 서버 설정
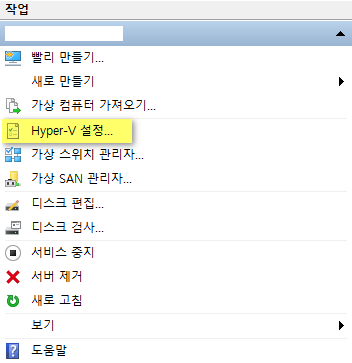
Hyper-V 관리자를 열어 서버에 연결합니다.
서버의 Hyper-V 설정을 엽니다.
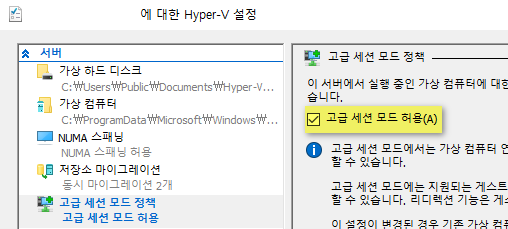
서버 밑 고급 세션 모드 정책의 고급 세션 모드 허용에 체크합니다.
사용자 밑 고급 세션 모드의 고급 세션 모드 사용에 체크합니다.
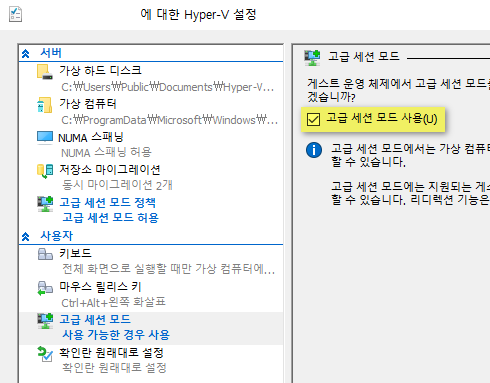
적용을 눌러 설정합니다.
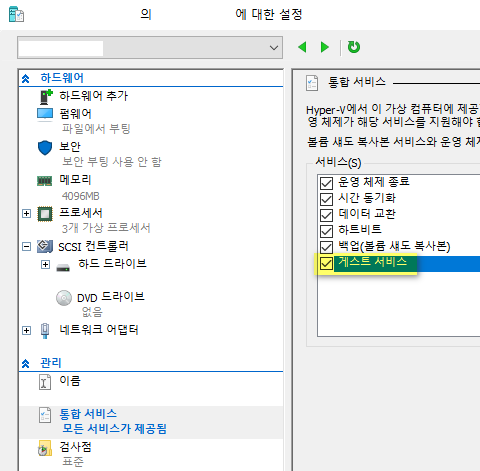
Hyper-V 가상 컴퓨터 설정
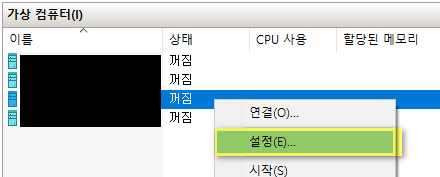
가상 컴퓨터의 설정을 편집합니다.
관리 밑 통합 서비스 목록 중 게스트 서비스를 체크합니다.
적용을 눌러 설정합니다.
호스트(RDP 클라이언트) 설정
Win+R -> gpedit.msc를 입력해 로컬 그룹 정책 편집기를 엽니다.
다음 그룹 정책을 편집합니다.
로컬 컴퓨터 정책/컴퓨터 구성/관리 템플릿/Windows 구성 요소/터미널 서비스/원격 데스크톱 연결 클라이언트/RemoteFX USB Device Redirection(RemoteFX USB 장치 리디렉션)/Allow RDP redirection of other supported RemoteFX USB devices from this computer(이 컴퓨터에서 지원되는 기타 RemoteFX USB 장치의 RDP 리디렉션 허용)
구성되지 않음에서 사용, 관리자 및 사용자로 변경합니다.
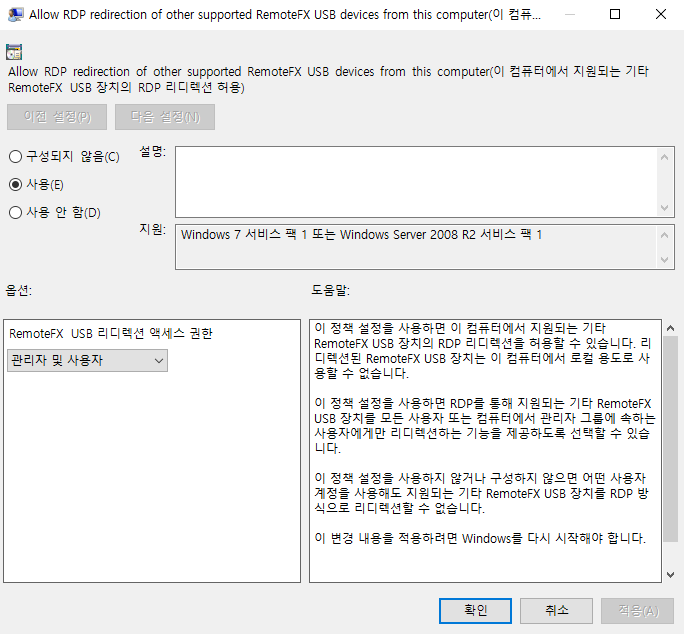
적용을 눌러 저장합니다.
Hyper-V에서 실행중인 가상 컴퓨터 설정
다음 그룹 정책을 편집합니다.
로컬 컴퓨터 정책/컴퓨터 구성/관리 템플릿/Windows 구성 요소/터미널 서비스/원격 데스크톱 세션 호스트/장치 및 리소스 리디렉션/지원되는 플러그 앤 플레이 장치 리디렉션 허용 안 함
사용 안 함으로 변경합니다.
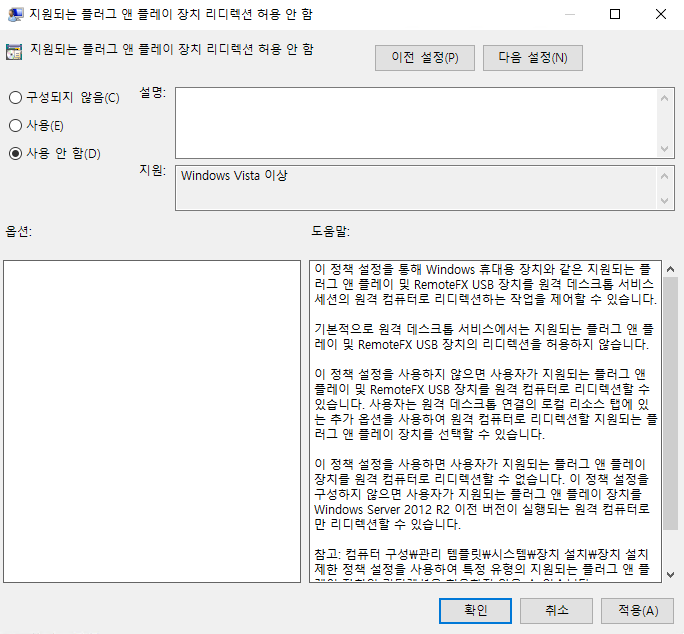
적용을 눌러 저장합니다.
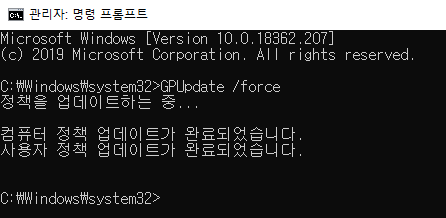
호스트와 가상 컴퓨터에서 관리자 권한으로 CMD를 각각 열어 GPUpdate /force 명령 실행 후 재부팅합니다.
RemoteFX USB 리다이렉션을 사용해 가상 컴퓨터에 연결
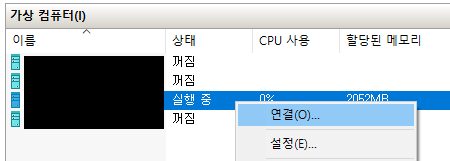
실행 중인 가상 컴퓨터에 연결합니다.
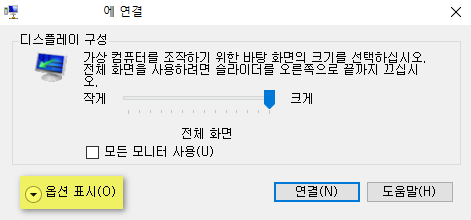
연결 전 나오는 대화상자에서 추가 옵션을 표시합니다.
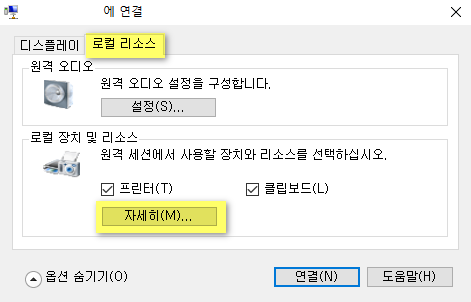
로컬 리소스 – 로컬 장치 및 리소스에서 자세히를 클릭합니다.
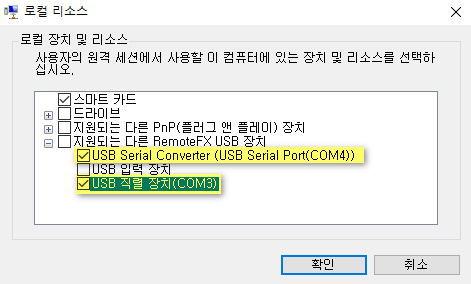
원하는 USB 장치들을 선택합니다.
확인을 눌러 저장하고 가상 컴퓨터에 연결합니다.
선택한(연결된) 장치들을 가상 컴퓨터 내의 장치 관리자에서 확인할 수 있습니다.

Use local resources on Hyper-V virtual machine with VMConnect
오